Table of Contents
GMTool - How To...
For a specific description of the different plugins, see Plugins.
Installation
First you need to have a Java runtime installed, at least version 6 (but version 7 should be fine, too).
Installation of the gmtool itself is pretty simple: Extract the contents of the gmtool.zip file somewhere. If everything is alright, you should be able to start it by double clicking the “gmtool.jar” file.
To add new plugins, simply copy them into the ”/plugins” folder of the gmtool.
Starting
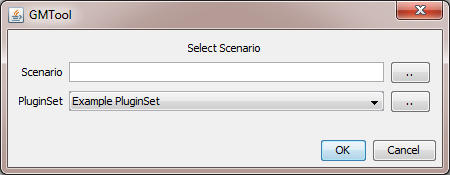
When starting the program by simply double clicking the “gmtool.jar” file, the first thing you should see is something like this:
Welcome
In this screen you can select your “Scenario” (which stores the images, texts, sounds, etc.) and the PluginSet your want to use.
You can either enter a name in the Scenario text field (it will be created) or choose an existing scenario file with the ”..” button to the right. If you selected an existing scenario file but want to create a new one, you can simply edit the text, again, a new one will be created.
The PluginSet is a little bit more complicated: The GMTool itself is dumb. It doesn't do anything, it's nothing more than an empty shell. To do something, for example, manage notes, you have to load a “Plugin”. Don't worry, there are already some generic plugins for you to use - system specific ones will follow. A PluginSet is simply the combination of some plugins. For example, let's say you want to manage your AD&D group. You could want to use the Sound-Player and the Note-Plugin, but not the Image-Plugin, as you want to handle that by giving out real handouts. So you simply create a PluginSet, call it “Sound and Notes” and the GMTool will only load these two plugins.
You can either choose a PluginSet from the drop-down box, create a new one, edit an existing one or even delete one. For the later three options, simply click the ”..” button to the right. Choose “Add” if you want to add a new PluginSet, “Edit” if you want to edit the currently selected one or “Remove” if you want to delete it.
Clicking “Ok” will end the dialog and start the GMTool.
Create or Edit PluginSets
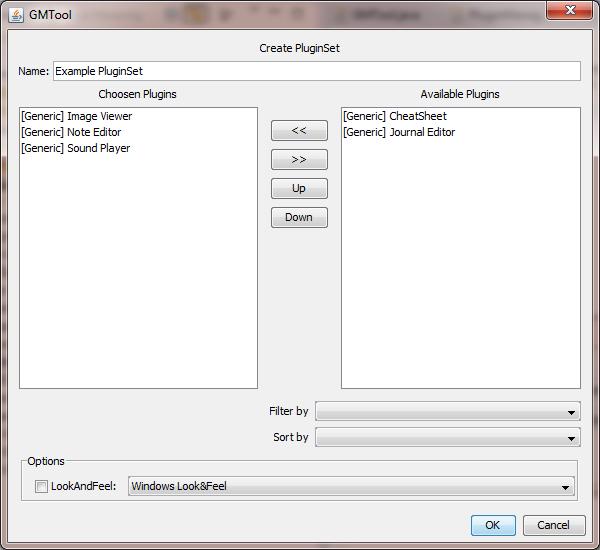
If you chose to add or edit a PluginSet, you will see this dialog:
Obviously, you can choose the name of the PluginSet at the top. You could, for example, create one PluginSet for every system you want to manage - or one for every campaign.
In the right list, all available plugins are listed. By clicking the ”«” button in the middle, you can move it into the PluginSet (click ”»” to remove it again).
At the moment, that's all there is (the rest is not functional yet). Simply click “Ok” to confirm your changes or “Cancel” to leave without changing anything.
Main Window
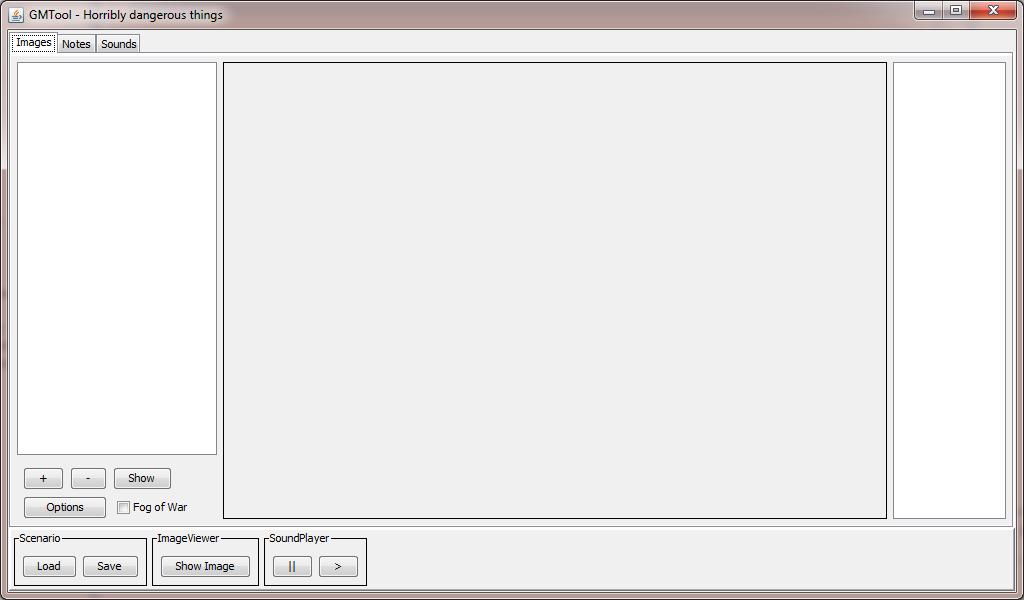
If you used the Example PluginSet, then the main window will look like this:
In the title, you can see the name of your choosen scenario.
As you can see, every plugin is displayed as a “tab” (Images, Notes, Sounds). As each plugin is unique, see their descriptions for more information about a specific one.
A plugin can (but does not have to) add buttons to the area at the bottom for tasks you might need often. For example, here, you see a “Show Image” button for the image viewer (this can show an image on an attached 2nd screen for your players to see) and the “Stop” (“||”) and “Start” (”>”)buttons for the sound player.
Always there are the save/load buttons: Use them to store the scenario into a file. This will save all loaded files in the different plugins and allow you to re-load them later. Please note, that at the moment, only the used filenames are stored, so copying only the scenario file onto another computer will NOT be enough. There will be an option to export a scenario to a .zip file later.
Resources and Scenarios
Resources are simply files, that you load into the GMTool via a plugin. For example, if you click ”+” in the Image Viewer plugin, then select an image which gets loaded into the Image Viewer, this image is called a “resource”.
A scenario is a list of resources, stored in an .xml file. So if you add the image and then save your scenario as “myscenario.xml” (for example), this file “myscenario.xml” will contain the information, that this image should be used as a resource. So be saving/loading a scenario, you save/load the information, which resources should be used. To load / save a scenario, simply click “Load” or “Save” on the bottom left control and select an .xml file.
Please note, that the scenario .xml file itself does NOT contain the resources themselves, just the information, where these resources can be found, for example “C:/temp/images/myimage.png”. So simply copying a scenario file onto another computer will not be sufficient to transfer the resources as well:
Fortunately, you can also save the scenario into a .zip file. This will not only store the scenario file, but also the resources themselves into the .zip file. To do so, simply choose a .zip file when saving/loading the scenario. This way, you can copy the file onto another computer where you can load it again.
Some plugins will allow you to modify resources, for example the Note Panel (making notes without the ability to save them is a little bit strange). Please note, that every newly created file will first be stored locally. To add them to a scenario .zip file, save your scenario again after adding the resources, this will add the resource to the .zip file too (and all following changes will be written to the resource in the .zip file).


